 Androidgrl
There and Back Again: An HTTPS Request’s Tale, part 1
08 Feb 2019What happens when you type a url into your browser? How does your browser make a secure connection to the host server, request and receive the information to display the website? This is the first in a four part series covering the steps involved in this process. There are four main steps: DNS lookup, SSL handshake, TCP handshake, and HTTP request/response. We will begin our journey with the Domain Name System (DNS) lookup.
When you type a url like https://www.google.com into your browser, your computer needs to find the actual IP address of the server hosting google’s website. This is because “https://www.google.com” is just a human readable address which means nothing to the computer in itself. The actual IP address for this url is 172.217.164.100. In fact if you type that number into your browser’s address bar it will take you to google’s site as normal. But the question is how does your browser know what the IP address is? The answer to the seemingly simple question is called the Domain Name System (DNS for short) and is a process that involves a vast network of servers worldwide whose sole function is to facilitate IP address lookups.
The DNS lookup involves 6 steps shown below.
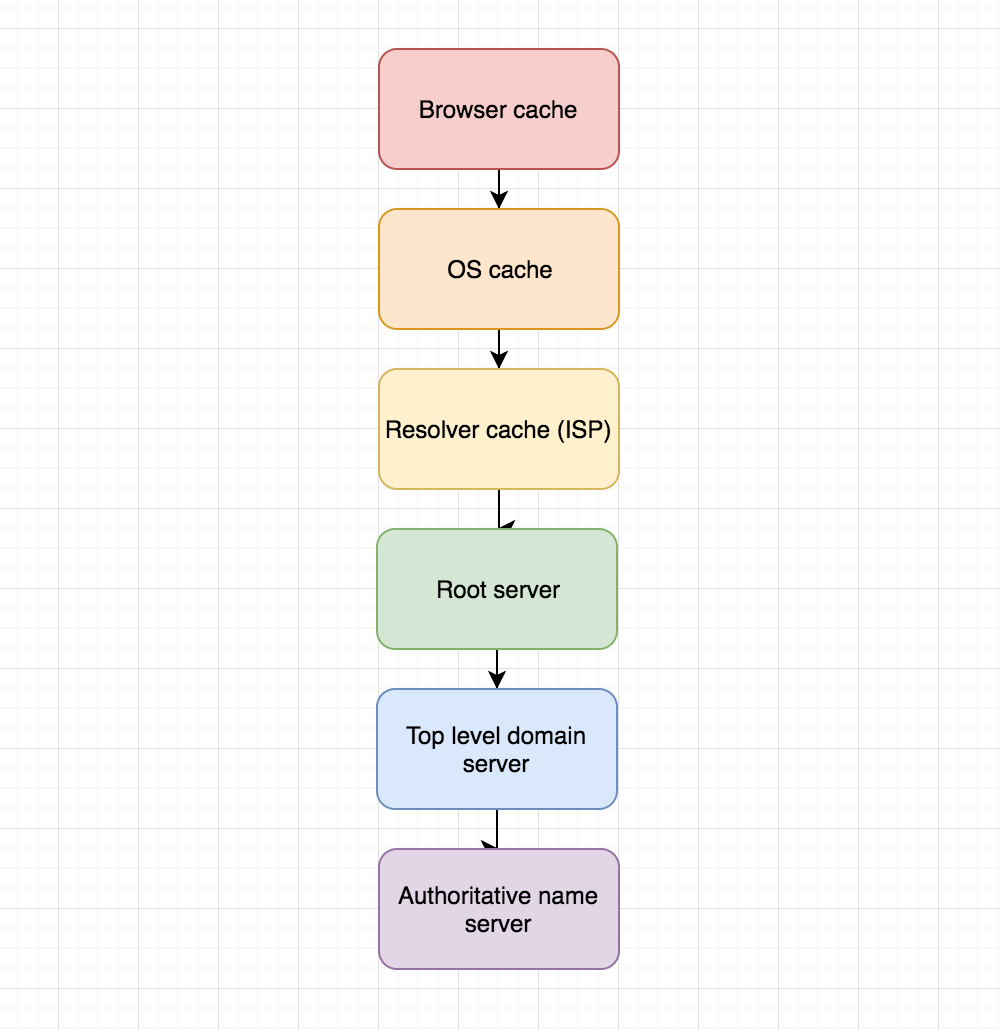
In the first step, your browser checks its cache to see if it already has it stored (if it has visited google before it stores the IP address in its cache).
If the address is not there, it goes to the second step and looks in your operating system’s cache.
If the address is not there, it goes to the third step and asks your internet service provider for it, which correspondingly looks in its cache.
If your ISP does not have it, then your ISP will perform the next steps in the lookup process. This is why the ISP is referred to as the “resolver”, because it takes on the responsibility of ultimately resolving what the IP address is.
In the fourth step, the resolver asks a “root server” for the location of the “top level domain server”. There are 13 root servers distributed across the world. Each is named after a letter in the alphabet from A-M. Although there are only 13 named servers, it does not mean that there are only 13 physical servers. Each named server is distributed over multiple servers, resulting in a network of hundreds of servers across the world.
In the fifth step, the resolver asks the “top level domain server” for the location of the “authoritative name server”. A top level domain (TLD), is the last part of a url. For example, www.google.com has a top level domain of .com. For each type of top level domain e.g. .net, .edu, .org, there is a top level domain server. The server is responsible for storing the addresses of the authoritative name servers for all websites with that top level domain.
In the sixth step, the resolver asks the “authoritative name server” for the IP address. It is the job of the authoritative name server to store IP addresses for websites. When a website is registered, part of the registration process is to notify the TLD server which authoritative name server stores the IP address for that website.
Now that the resolver has the IP address, it gives it to your browser, so your browser now knows the address of the server to request the website from.
In the next post we will cover the next step in our journey- the SSL handshake!